

It’s been extremely cold the past couple of weeks, and I know all I want to do is stay indoors and sit under my blanket all day. In my effort to be comfortable, I often find myself too lazy to drive out to the grocery store and shop for food. Those are the days when I try my best to survive on what I have remaining in the fridge and cupboards. However, sometimes times are desperate, and call for desperate measures…..like baking my own bread.
I know, I know, it sounds complicated and highly classified. Something only those with industrial machines and huge batches of dough should attempt. Have no fear – because after all bread is bread. How hard can it be? Plus, it warms up the house, makes it smell nice, and pairs wonderfully with all kinds of soup. So why not give it a try.
I first became interested in baking bread about two years ago when reading a country cookbook. There was a whole two pages dedicated to the recipe with huge high resolutions pictures that almost made the crisp bread noise as you flipped past them. It was then, I knew what my next experiment would be. Ever since trying that specific recipe twice, I have been constantly looking up new recipes and versions to try. I tried so many, that I learned exactly what each ingredient does to my bread, the little tricks to help make my dough rise and my loaf look presentable, and even the recipe that works for me.
That’s right. After many a trial and error, I compiled the ingredients I found easiest to work with, and put together my own recipe for bread. I have learned the hard way to proof my yeast, and to make sure I am ready for a workout, because there is some hardcore kneading involved. Here’s my favorite recipe below:
Ingredients:
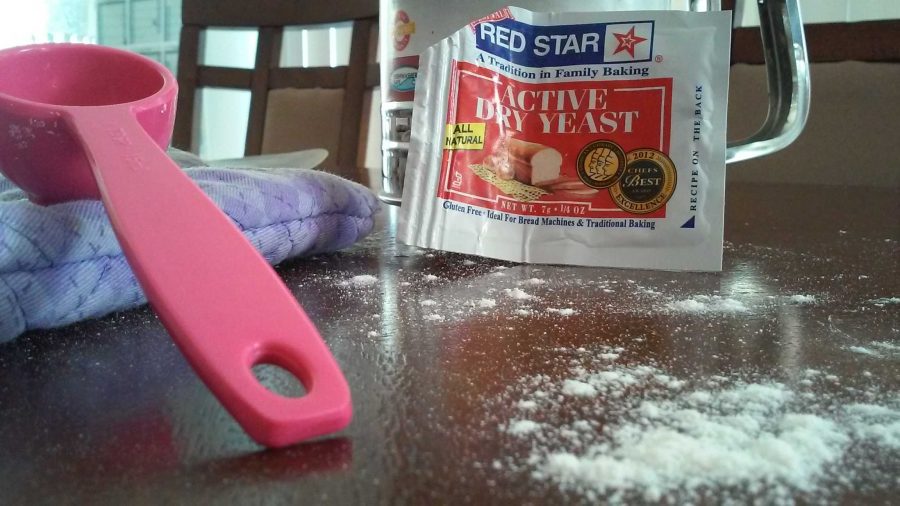
- 1 package active dry yeast
- 1 cup warm water (not too hot!)
- ¼ cup granulated sugar
- ½ Tbs salt
- 1 egg, beaten
- ⅛ cup vegetable oil
- 3 ¼ – 3 ½ cups all-purpose flour (sifted)
First, warm the water and put your finger in it. If it’s comfortable for you and does not burn, it is perfect. Pour the water in a bowl and add a tablespoon of the sugar and the package of yeast. Stir to dissolve. Even though we are using active dry yeast, I have had loaves that did not rise on me. So before you go through all the work for making bread, make sure the yeast is good! If after a little over five minutes a foam starts to form, the yeast is good to use.
Stir the beaten egg, oil, salt, and remaining sugar in a large bowl. Add the proofed yeast mixture, then, gradually add the sifted flour. The reason there is not an exact measure for the flour is because it depends on the humidity of air when you are making the bread. Sometimes more flour will be required and sometimes less in order to achieve the right texture.
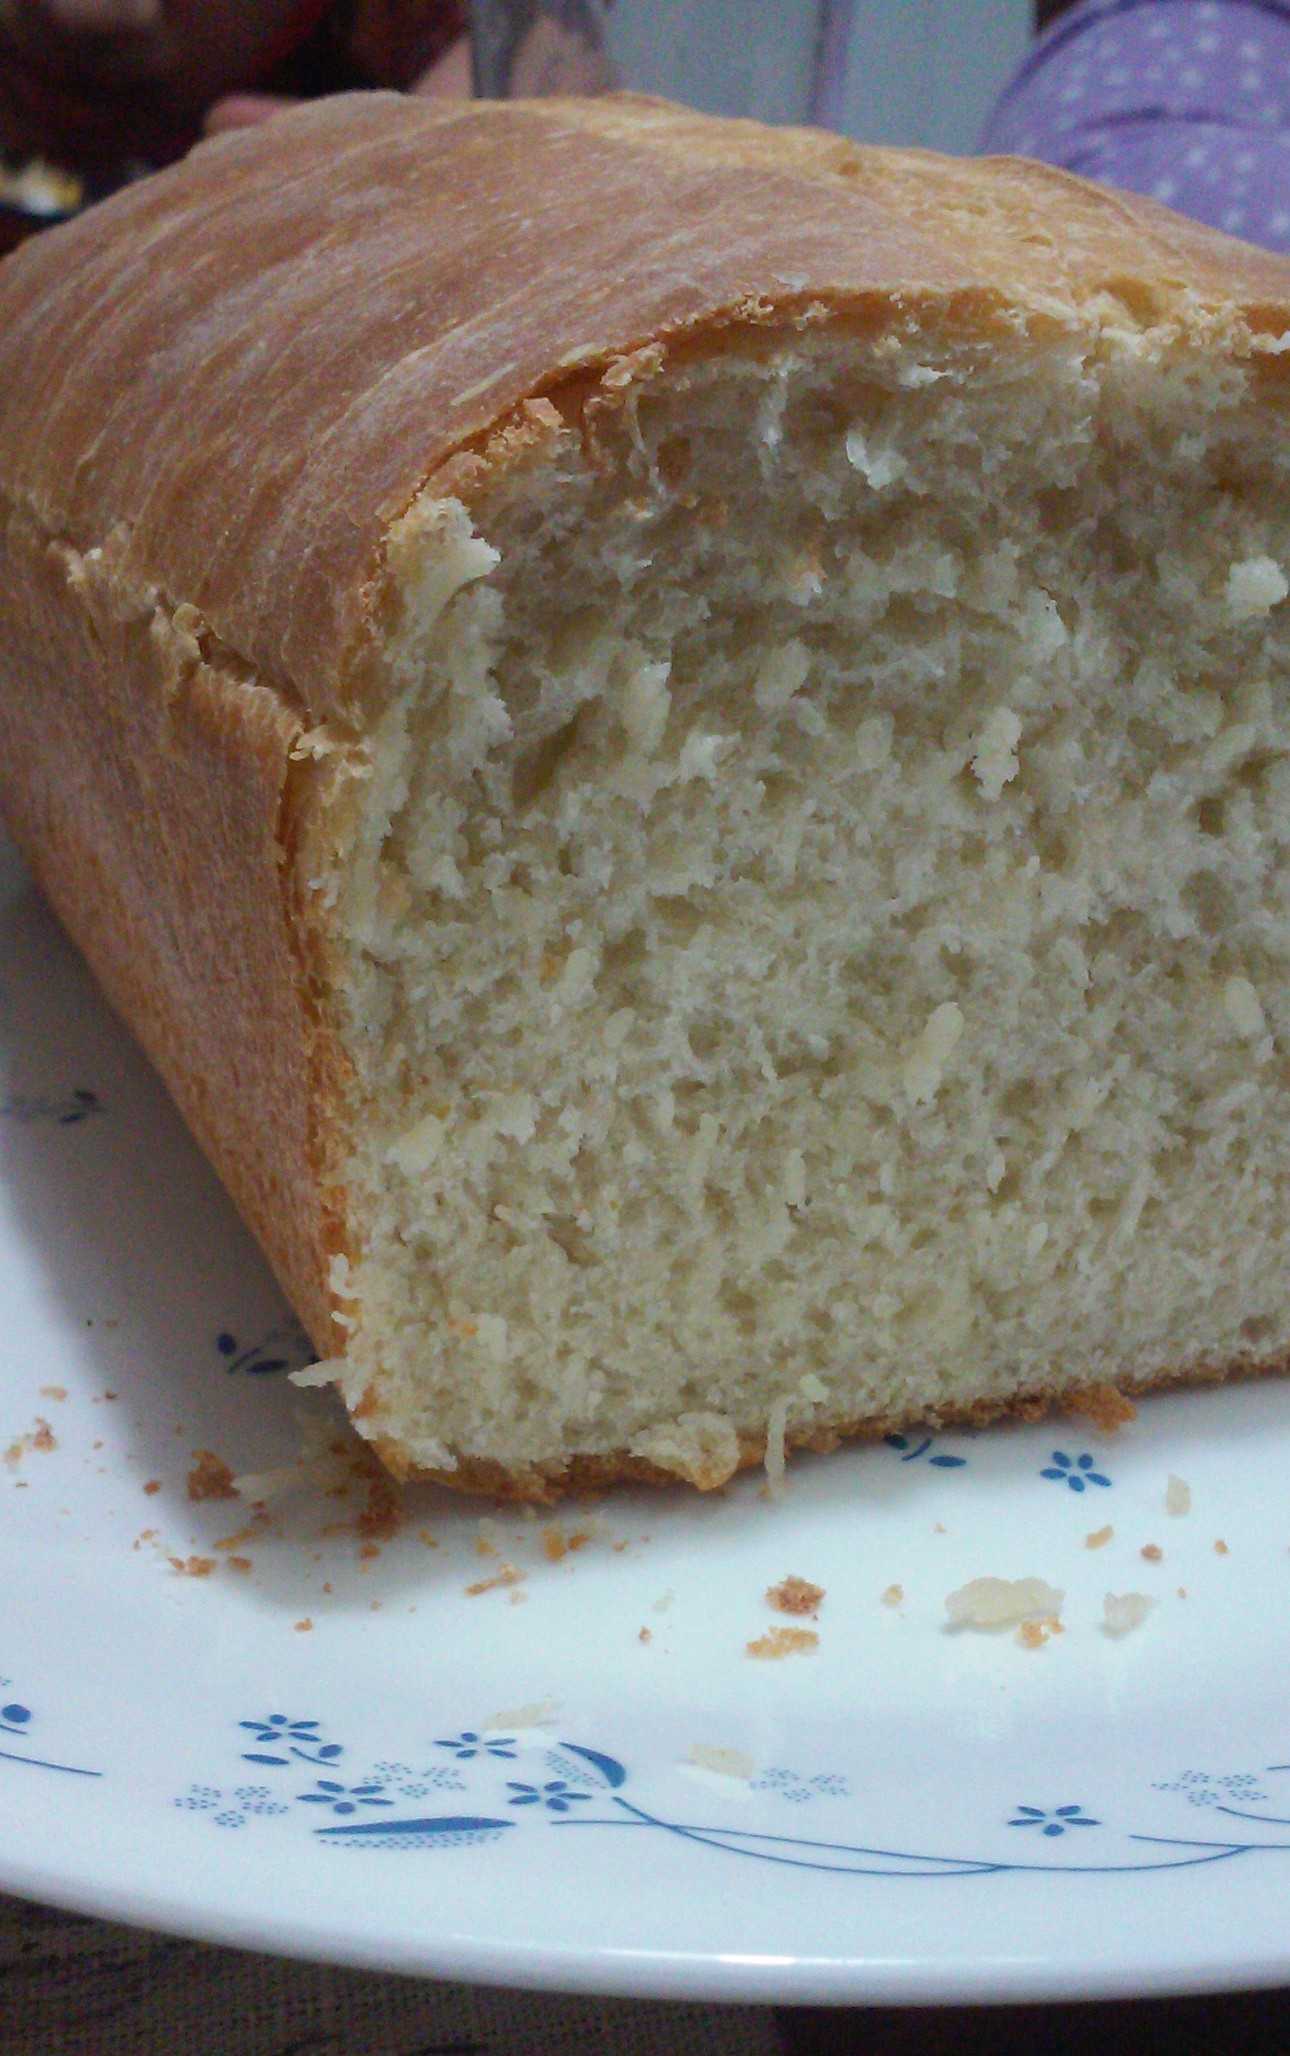
Continue to add the flour until it forms a soft dough. Now is the physical part: knead the dough for 6-8 minutes. Turn out dough on lightly floured surface. I like to use my clean counter since I get lots of room. I usually go 8 because it takes a minute or two just to knead in enough flour. It will be very sticky at first, so beware. Knead until the dough feels smooth and elastic, but not too sticky like before. To knead, just keep folding the dough, and pressing your palm in a rolling motion, then turn the dough in a quarter circle and keep repeating. You can feel free to add flour as you are kneading to make it smooth.
Now that the dough is all kneaded, it will need to rise in a greased bowl, covered, and away from draft until dough has doubled in size. A trick is to boil a pot of water and place it on the bottom rack of a cool oven, with the dough on the middle rack. This way, the warm, moist environment can help to speed up the rising process. It will be ready if when you press with your fingers the dents stay in the dough.
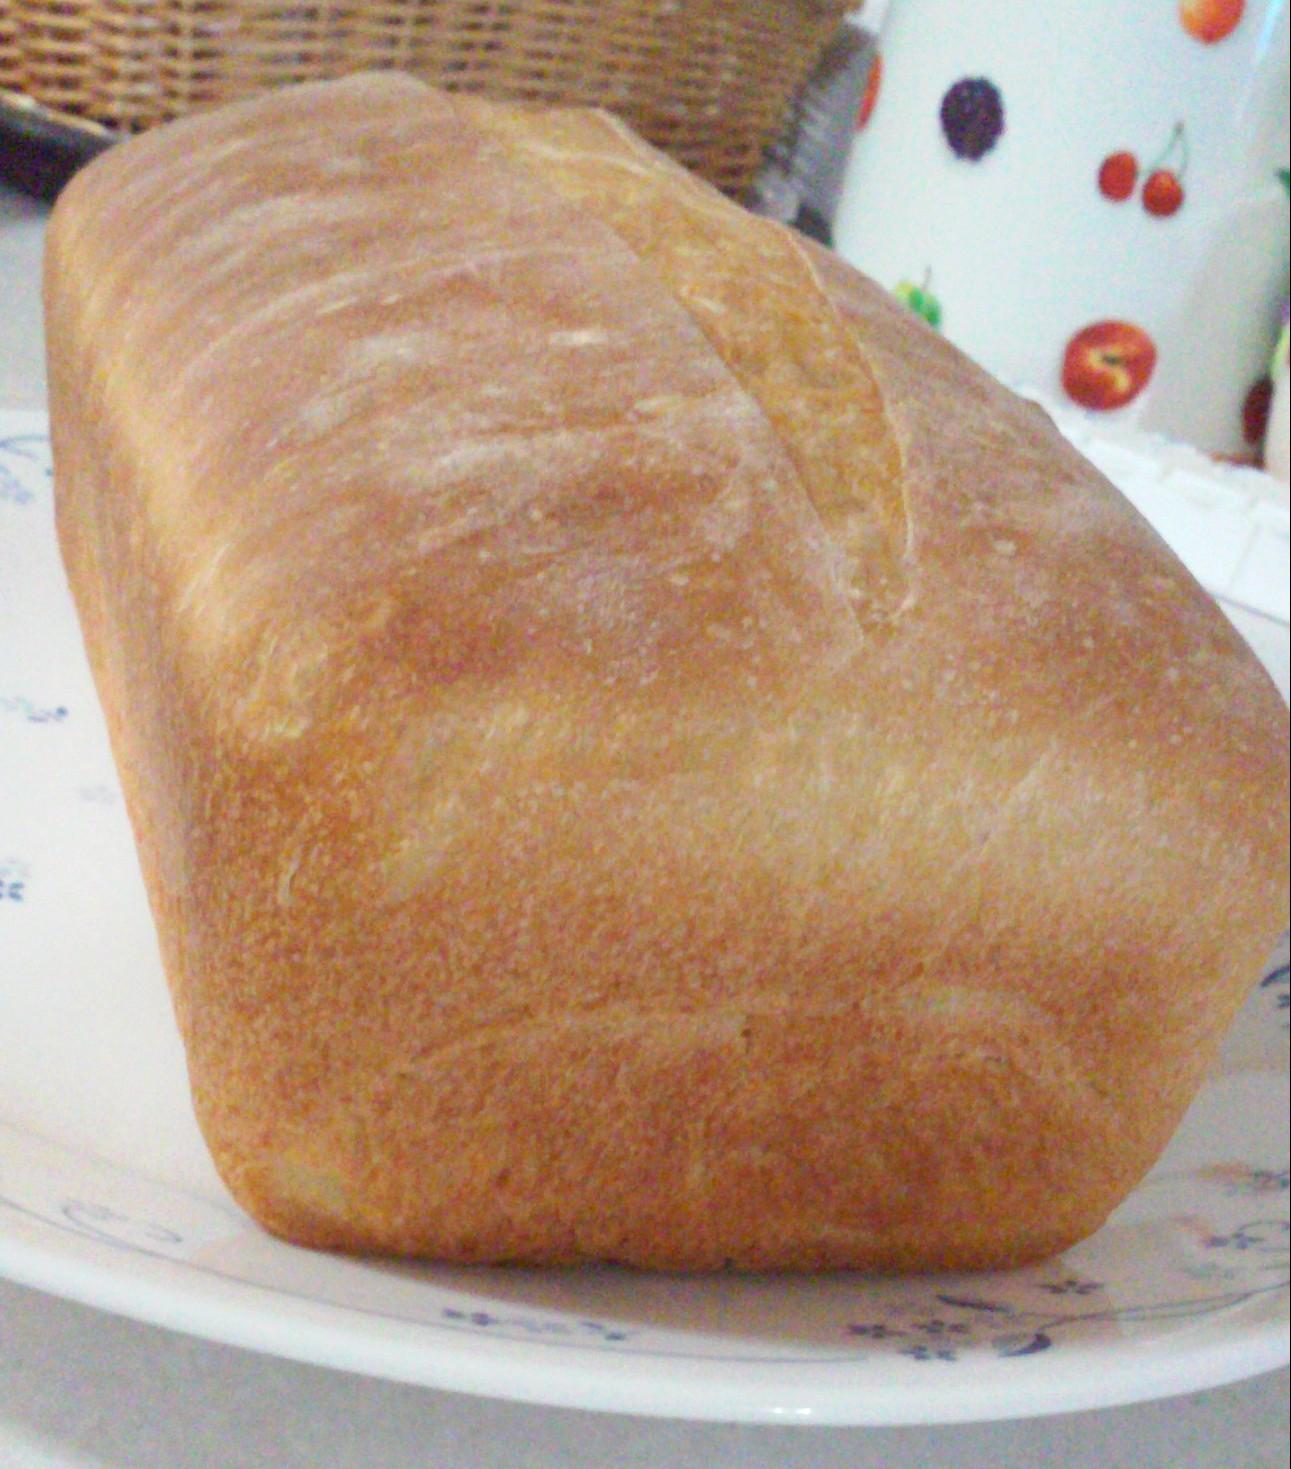
When it has doubled, punch down the dough in the center, gather it all up into a ball, dump out onto a floured surface, and shape into a loaf. How do you do that you ask? Just form the dough into a ball, and let it rest for 5 minutes. This will let the elasticity in the dough relax a little before we manipulate it again. Flatten the ball into a rectangle, then fold the bottom half up and the top half of the rectangle down. Pinch the seam (where the folds meet) closed. Press the seam down, bringing up the sides, and pinch closed again. We want to make the loaf as tight and formed as we can, to ensure it retains it’s shape while baking and does not rise weird. Just keep folding and pinching until you like the way it looks.
Then, place the loaf in a greased loaf pan and let rise until doubled again. Do it exactly the same as the first time. Lastly, bake at 375 for 25-30 minutes. (Don’t forget to preheat the oven for at least 5 minutes before putting the loaf inside!)
*One last tip: the bread is done baking when you tap the bottom of the loaf and it sounds hollow.
Enjoy the crisp bread, warm house, and comforting smell! Hopefully if you were bored before, or just ran out of bread in the bitter cold weather, you’ll find this recipe helpful!